Volumes
A Volume is a collection of data but typically has the functionality of a formatted hard drive and can host a file system. It can be the root partition (the partition containing the operating system) of a virtual machine (VM) that can be booted, or could act like an extra disk that can be mounted by a VM. Red Cloud volumes are charged for according to their size and for how long they are stored.
Create and Attach a Volume
Volume creation is useful for attaching a data volume or a volume with users' home directories to an instance, as it is often good to separate the concerns of an operating system and user data. This makes it relatively easy to switch operating systems and maintain the same data, and to archive the more important parts of the project (the data) if needed.
Create
- Go to the "Volumes" tab in the OpenStack Web Interface
- Click the "Create Volume" button
- Enter a name and size
- Click "Create Volume"
Attach
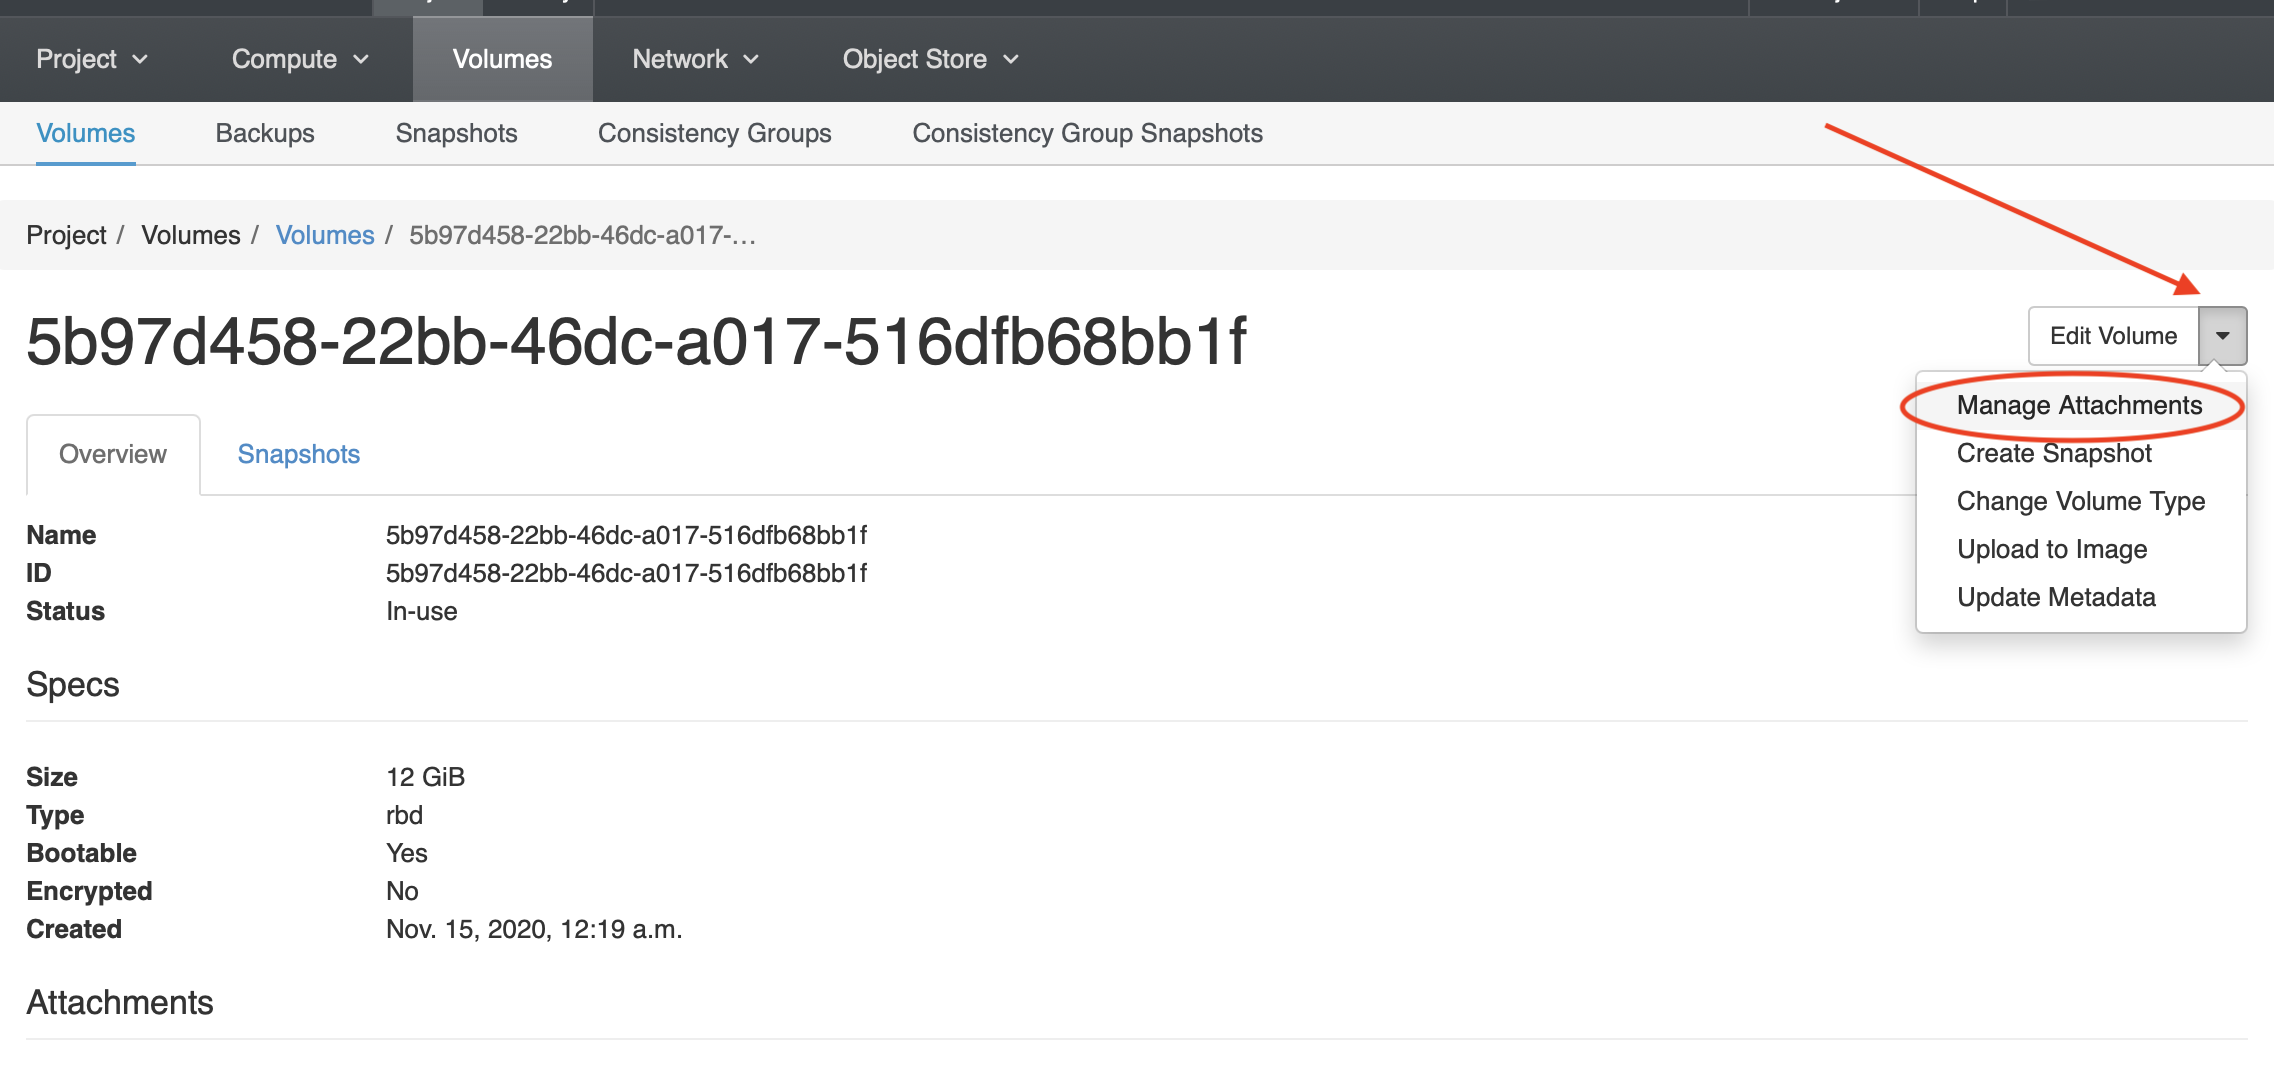
- Go to the "Volumes" tab in the OpenStack Web Interface
- On the Actions dropdown menu for the volume you want to attach, select "Manage Attachments"
- Select the instance you wish to attach to and click "Attach Volume" *Note that the device name specified is usually not important and not always adhered to
Once You Have Attached The Volume
- For Linux:
- Login to your instance
- Run
lsblkto see which/dev/vdXis the likely candidate (for some character 'X') 1.Follow the instructions for initializing and mounting your volume (replacevdbwith thevdXdiscovered in the previous step)
- For Windows:
- Login to your instance
- Follow the instructions for initializing and mounting your volume
Snapshots
Snapshots of volumes (and of instances, in which case the volume is implicitly the root volume of the instance) create a state save of the existing volume, so you can easily get back to a certain state in the future. This is most useful for OS volumes to create safe checkpoints of working operating system configuration states. It may be less useful for larger data volumes; a more efficient solution might be to use ZFS snapshots on Linux instances.
Snapshots can be created from the Actions dropdown menu. Note that if you are creating a snapshot of a root volume for an instance, it should not be running. You should first shut off or shelve the instance, and then take the snapshot. (The reason for this is to flush the contents of the write cache to disk.)
Snapshots of volumes can be shared with users on a different project (or even with yourself, if you are a member of multiple projects). Simply follow the procedure for sharing found on the OpenStack docs. If the snapshot is of an instance, it may be easier to perform the necessary steps from the command line, as found on CAC's Images page.
Add Storage Capacity
There are at least three ways to add more storage capacity to your instance:
- Create a new volume and attach it to the instance as described above, then format the volume and mount the file system in Linux or in Windows; or
- Increase the size of an existing volume, assuming the volume is not the root volume (i.e., the volume containing the root directory
/and the OS) ; or - Increase the size of the root volume of the instance, either by
The second and third possibilities are described in this section.
Extend an Existing Volume
You can increase the size of an existing volume (but not make it smaller) when the volume is in the detached state. (The special case of a root volume, which is not allowed to be detached from its instance, is covered in the next section.)
- Detach the volume if it is attached to an instance.
- Unmount the file system to make sure all cached changes are flushed back to disk:
- From inside a Linux instance, do
umount /mount_point, where/mount_pointis the absolute path on which the file system is mounted. - From inside a Windows instance, start the Disk Management Tool, right click on the drive that is to be detached, and select "Offline".
- From inside a Linux instance, do
- Under Project->Volumes->Volumes on the Red Cloud web console, select the volume you want to detach.
- (Optional but recommended) Click on the "Edit Volume" button in the upper right corner to rename the volume so it is easier to be identified in the subsequent steps.
- Under the pull down menu in the upper right corner, select "Manage Attachments."
- Unmount the file system to make sure all cached changes are flushed back to disk:
* Click on the "<tt>Detach Volume</tt>" button on the next screen and confirm.
- When the volume is in the detached state and back on the Volumes screen, select the volume again. Under the pull down menu in the upper right corner, select "Extend Volume."

- On the next screen specify the new size for the volume and click on the "Extend Volume" button.
- Re-attach the volume to your instance.
- From inside the instance, extend the file system on the extended volume:
- In Linux, if the file system is
ext3orext4, - Run the
resize2fs device_namecommand, where device_name is the device name of the newly extended volume, e.g./dev/vdb. - Re-mount the file system.
- In Linux, if the file system is
xfs, - First re-mount the file system.
- Run the
xfs_growfs /mount_pointcommand, where/mount_pointis the absolute path name on which the file system is mounted. - In Windows, if the file system is
NTFSorReFS, - Use the Disk Management tool, as described in Microsoft's documentation.
- In Linux, if the file system is
- From inside the instance, confirm the new, larger size of the file system:
- In Linux, use the
df -hcommand. - In Windows, assuming the disk was assigned a drive letter (such as D:), check the Properties of that drive in File Explorer.
- In Linux, use the
Extend the Root Volume of an Instance
A root volume may not be unmounted or detached when it is running the OS. This is why you must either copy the root volume and enlarge it, or extend the root volume after deleting the instance that it is attached to.
Create a Bigger Copy of the Root Volume
The safer way to extend a root volume is to make a copy of it, extend the copy, and boot a fresh instance from the bigger copy. If everything is working well, the original instance can then be deleted, along with any snapshots of the original, smaller volume and the original volume itself. Here is how to do it.
- Shelve the instance. (This flushes the write cache to disk.)
- Bring up the details about the root volume by clicking on the instance's name, then the name of the volume.
- Select "Edit Volume" from the drop-down menu and name the root volume to something more memorable, like “volume_to_extend”.
- Choose "Create Snapshot" from the drop-down menu, give it a name, and force the snapshot. A list of "Volume Snapshots" will appear that includes the one you just made.
- Select "Create Volume" for this snapshot, giving it a bigger size as well as a memorable name, like "bigger_volume". A list of "Volumes" will appear that includes the one you just created.
- Choose "Launch as Instance" for this volume. In the "Source" pane, you will have to select “Volume” in the "Select Boot Source" menu so you can choose “bigger_volume” as the source. After it boots up, the instance should automatically extend the file system to encompass the larger space.
- Disassociate the floating IP from smaller instance (if one has been assigned) and associate the floating IP to the larger instance (again, if appropriate).
- Confirm that the new instance works as expected. If you like, you can log in to the instance and run
df -h(or look at the size of its C: drive) to confirm the new, larger size, as well as check for the expected files and applications. - If everything is working well, the original instance can then be deleted, along with any snapshots of the original volume and the original volume itself.
Note that this procedure assumes that the OS will detect the additional disk space and automatically extend the file system to encompass it. This is true in Windows, and it will be true in Linux as well if a certain package is installed, as it should be for all the Linux images in Red Cloud. To verify that this is the case:
- Log in to the instance as centos (or ubuntu or root) using the matching SSH private key.
- Run
sudo yumorsudo apt install cloud-utils-growpart. This should inform you that the package is installed already. - Log out.
Extend the Root Volume After Deleting the Instance
It is possible to extend the root volume of an instance without making a copy of it. But to do that, the instance must first be deleted, as this is the only way to detach the root volume.
The procedure is similar to the one outlined above, with a few modifications:
- Shelve the instance (to flush its files back to disk);
- Give the attached volume a more memorable name, like "volume_to_extend";
- Take a snapshot of the volume (so it will not be deleted in the next step);
- Delete the instance, causing the volume to be detached (so the properties of the volume can be changed);
- Extend the volume as described previously;
- Launch a new Linux instance from the resized volume.
For the last step, in the "Source" pane, you will want to select “Volume” in the "Select Boot Source" menu so you can choose "volume_to_extend" as the source. As before, the OS should automatically detect the extra disk space and extend the file system into it.