Red Cloud GPU Image Usage
This wiki provides documentation for creating and using a GPU instance in Red Cloud from a Ubuntu-based (gpu-accelerated-ubuntu-2020-08 or a CentOS-based (gpu-accelerated-centos-2020-08 GPU image. The image features:
- GPU acceleration via CUDA 10.1.
- Anaconda distribution to facilitate usage of platforms such as TensorFlow,
- Docker-containerized Jupyter Notebook servers, and
- MATLAB R2019a.
A test application using the Python neural network library Keras, which runs on top of the TensorFlow framework, is provided to check and test GPU utilization.
The intent is to help you to get a quick start on using GPU-accelerated software in your work, with minimal effort on your part.
Create a Server Instance
First you'll want to take care of a few preliminaries covered elsewhere in this wiki:
- Familiarize yourself with the OpenStack web interface
- Create an SSH keypair, or upload your public key
- Create a custom Security Group if you haven't already
Now you're ready to launch a new server instance:
-
In the OpenStack web interface Dashboard, navigate to Compute > Instances.
 .
. -
Click on “Launch Instance”.

- Make selections on the Launch Instance screen:
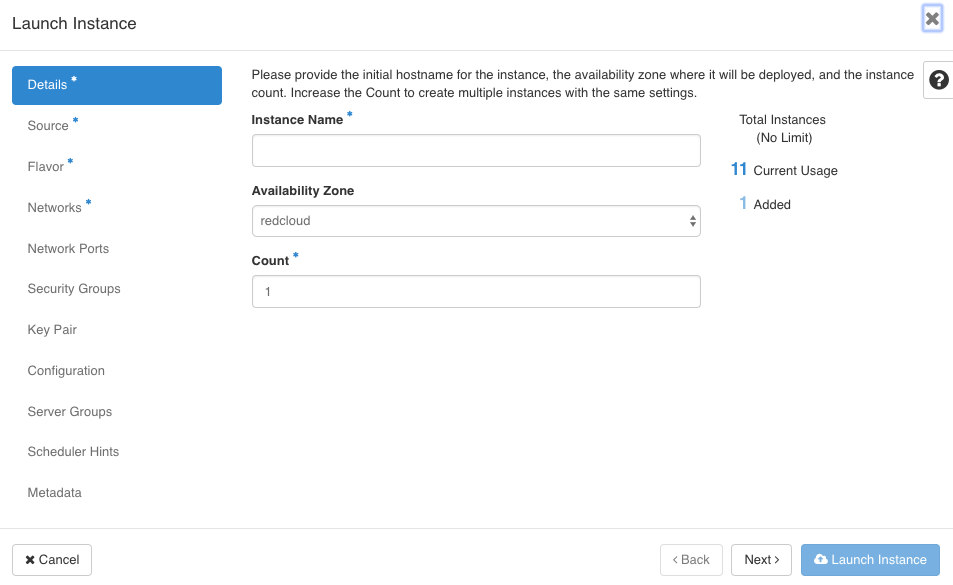
- Details tab: enter the instance name (your choice).
- Source tab:
- Boot Source = “Image”.
- Among the list of images, choose “gpu-accelerated-centos-2020-08” for Centos 7.8 or “gpu-accelerated-ubuntu-2020-08” for Ubuntu 18.04 LTS by clicking on the ⬆️ button.
- Volume Size: increase as necessary. For reference, the Anaconda distribution alone is 19GB.
- Flavor tab: select instance server configurations. Choose between "c4.t1.m20" (Tesla T4 GPU) and "c14.g1.m60" (Tesla V100 GPU for large jobs). If you need multiple GPUs on one instance, please reach out for special accommodation.
- Networks tab: “public” is a good default.
- Security Groups tab: Click ⬇️ on the “default” group to deselect the default security group. Click ⬆️ to select the custom security group you created above.
- Key Pair tab: Select the ssh key pair you had created above.
- Other tabs do not require modification.
- Click the "Launch Instance" button to create your server instance.
- Note the IP Address of your newly-created instance.
SSH Login
In a new terminal window, Chrome extension ssh or Putty, SSH into the instance:
-
For Ubuntu instance:
ssh -i ~/.ssh/id_rsa ubuntu@<IP_Address_from_previous_step> -
For CentOS instance:
ssh -i ~/.ssh/id_rsa centos@<IP_Address_from_previous_step>
This assumes that your matching private key is saved as ~/.ssh/id_rsa.
CAC Recommends
Monthly security update patching:
-
For Ubuntu instance:
sudo apt dist-upgrade -
For CentOS instance:
sudo yum update
Installed Software
CUDA
- Check version with
yum info cuda(not applicable for Ubuntu) - Check CUDA version currently in use with
nvcc --version(base) ubuntu@shl1-test1:~$ nvcc --version nvcc: NVIDIA (R) Cuda compiler driver Copyright (c) 2005-2019 NVIDIA Corporation Built on Sun_Jul_28_19:07:16_PDT_2019 Cuda compilation tools, release 10.1, V10.1.243
NVIDIA Driver
- Check version with
dkms status<- Run
sudo yum install dkms(CentOS) orsudo apt install dkmsif “command not found”
- Run
-
Check detection of GPU devices by CUDA via NVIDIA’s drivers:
nvidia-smi(base) ubuntu@shl1-test1:~$ nvidia-smi Sat Aug 29 01:38:55 2020
+-----------------------------------------------------------------------------+ | NVIDIA-SMI 450.57 Driver Version: 450.57 CUDA Version: 11.0 | |-------------------------------+----------------------+----------------------+ | GPU Name Persistence-M| Bus-Id Disp.A | Volatile Uncorr. ECC | | Fan Temp Perf Pwr:Usage/Cap| Memory-Usage | GPU-Util Compute M. | | | | MIG M. | |===============================+======================+======================| | 0 Tesla T4 Off | 00000000:00:05.0 Off | 0 | | N/A 41C P0 27W / 70W | 0MiB / 15109MiB | 6% Default | | | | N/A | +-------------------------------+----------------------+----------------------+
+-----------------------------------------------------------------------------+ | Processes: | | GPU GI CI PID Type Process name GPU Memory | | ID ID Usage | |=============================================================================| | No running processes found | +-----------------------------------------------------------------------------+Note that the CUDA version displayed on top right of this output is not necessarily the CUDA version currently in use.
Anaconda
- Check overarching Anaconda version with
conda list anaconda$ - Check “conda” package manager version with
conda -V - Check list of packages installed with
conda list - If desired, update to latest version with
conda update --all - For environment information, such as base paths or Python platform versioning, use
conda info - An Anaconda environment should already be activated upon startup, indicated by
basepreceding each command line prompt.(base) ubuntu@shl1-test1:~$
This “base” environment applies specific settings to your shell for the choice of a Python interpreter and its associated modules and libraries.
Use which python for identifying the environment’s Python location; python -V for Python version.
Docker
-
To start docker using docker:
sudo usermod -aG docker $(whoami) sudo service docker start -
To view existing images pulled onto this instance,
docker images -
To view existing containers, both running and exited,
docker ps -a -
To enter terminal of a running container,
docker exec -it <Container Name or Container ID> bash -
To restart an exited container (starts from latest first),
docker start `docker ps -q -l` -
To exit container Terminal without exiting or killing the container, press CTRL+p then CTRL+q.
For more information on Docker, see the official Docker documentation or the Aristotle user documentation.
MATLAB
MATLAB is installed in /usr/local/bin/matlab. See GPU Computing in MATLAB page from MathWorks for more information.
Testing with Sample Application with Virtualization Only
Each of these frameworks can be set up in their own Conda environments.
-
Use
conda env listto see the list of existing usable environments.(base) ubuntu@shl1-test1:~$ conda env list # conda environments: # base * /home/ubuntu/anaconda3 pytorch /home/ubuntu/anaconda3/envs/pytorch tf_gpu /home/ubuntu/anaconda3/envs/tf_gpu
-
Use
conda deactivateto exit current environment and return to “base” environment.
Keras-GPU on TensorFlow-GPU
-
Activate the Virtual Environment for TensorFlow
- With the “base” Anaconda environment still activated,
conda create -n tf_gpu tensorflow-gpu
conda activate tf_gpu
- With the “base” Anaconda environment still activated,
-
Install necessary packages:
conda install tensorflow-gpu keras-gpu -
Ensure the iPython command-line terminal used is from within the environment, not an external version:
conda install -c anaconda ipythonwhich ipythonshould output~/anaconda3/envs/tf_gpu/bin/ipython -
Start
ipythonand paste this sample app at the ipython prompt:import tensorflow as tf from tensorflow import keras from tensorflow.keras import layers import numpy as np tf.config.list_physical_devices('GPU') -
You should get output like this:
Out[3]: [PhysicalDevice(name='/physical_device:GPU:0', device_type='GPU')]
PyTorch
-
Activate the Virtual Environment for PyTorch
- With the “base” Anaconda environment still activated,
conda create -n pytorch conda activate pytorch
- With the “base” Anaconda environment still activated,
-
Install necessary packages:
conda install pytorch torchvision -c pytorch pip install pycuda -
Ensure the iPython command-line terminal used is from within the environment, not an external version:
conda install -c anaconda ipython -
Start
ipythonand paste this sample app at the ipython prompt:import pycuda import pycuda.driver as drv drv.init() print('CUDA device query (PyCUDA version) \n') print('Detected {} CUDA Capable device(s) \n'.format(drv.Device.count())) for i in range(drv.Device.count()): gpu_device = drv.Device(i) print('Device {}: {}'.format( i, gpu_device.name() ) ) compute_capability = float( '%d.%d' % gpu_device.compute_capability() ) print('\t Compute Capability:{}'.format(compute_capability)) print('\t Total Memory: {} megabytes'.format(gpu_device.total_memory()//(1024**2 ))) -
You should get the output
CUDA device query (PyCUDA version) Detected 1 CUDA Capable device(s) Device 0: Tesla T4 Compute Capability:7.5 Total Memory: 15109 megabytesor
CUDA device query (PyCUDA version) Detected 1 CUDA Capable device(s) Device 0: Tesla V100-PCIE-16GB Compute Capability:7.0 Total Memory: 16160 megabytes
Testing with Sample Application: with Virtualization + Docker Containerization
Keras GPU on TensorFlow-GPU
-
Create a new container:
docker run --gpus all -v $(realpath ~/notebooks):/tf/notebooks -p 8000:8000 tensorflow/tensorflow:latest-gpu-jupyter sleep 100000 &- The
--gpus alltag is for employing devices as detected by nvidia-smi. tensorflow/tensorflow:latest-gpu-jupyteris the specific image used.- Read more about this image and other possible tags at DockerHub.
- The container runs a Jupyter Notebook server, exposed on host port 8888, from your own directory (here stated as ~/notebooks).
- The
-
Test run the new container, then exit and disconnect:
- Use
docker psto check theContainer ID(first column) orName(last column) - Run
docker exec -it <Container ID or Name> bash - Press CTRL+p and CTRL+q to exit container without killing it.
- Press CTRL+d to end SSH connection to VM.
- Use
-
Re-connect to the VM via SSH Tunneling, then restart the Docker TensorFlow Container: ssh -L 8000:localhost:8000 centos@<IP> OR ssh -L 8000:localhost:8000 ubuntu@<IP>
-
Then
docker exec -it <Container ID or Name> bash -
Spin up a Jupyter Notebook within this Docker container:
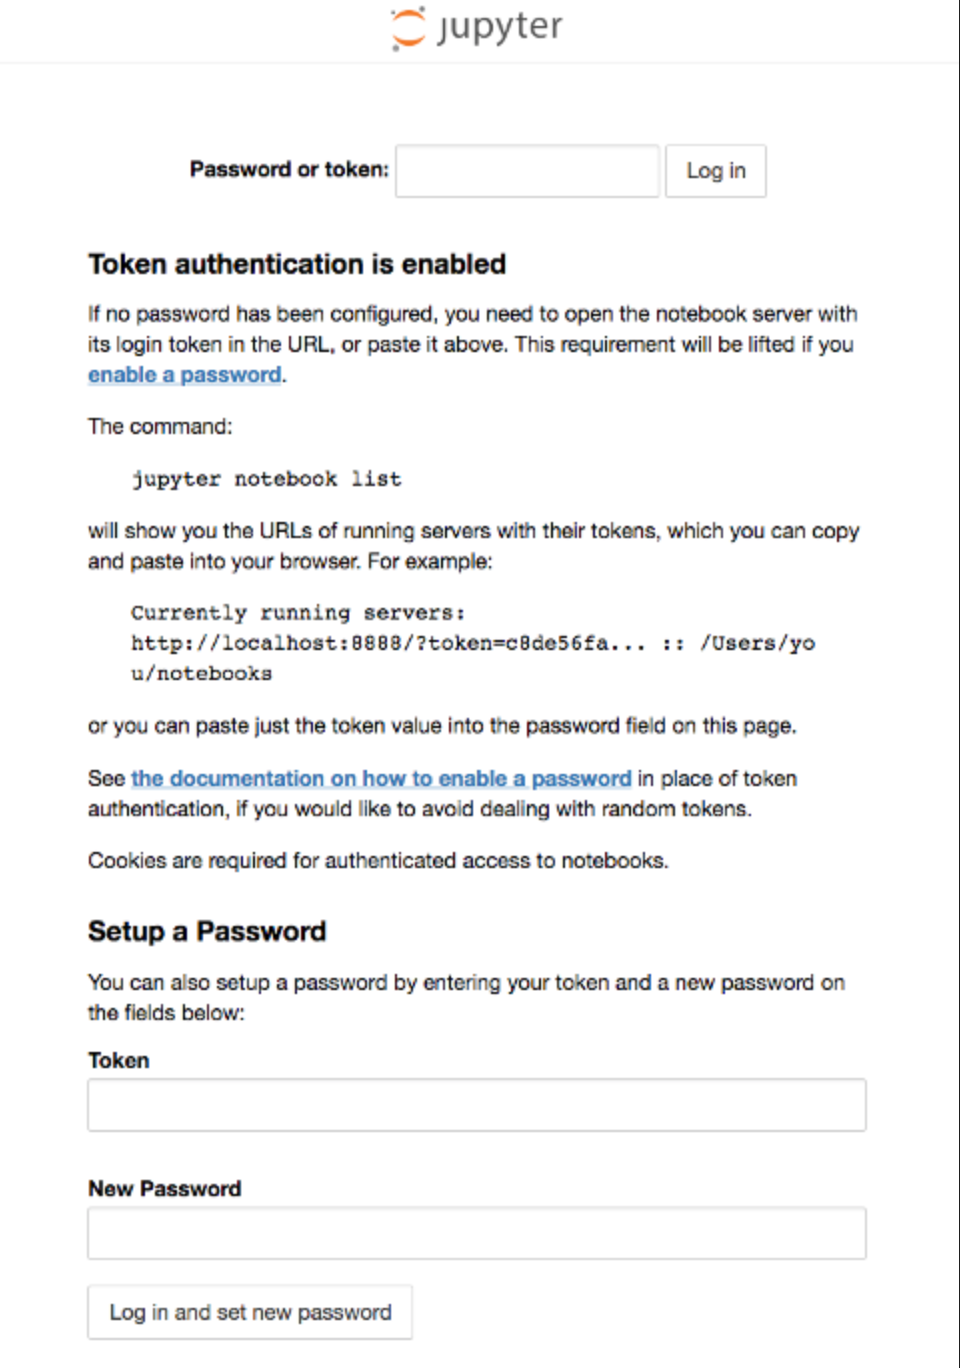
jupyter notebook --ip 0.0.0.0 --port 8000 --allow-rootCopy the token provided above for use in the next step. Note: “No web browser found” error may occur, ignore if the next step is successful. If not, Ctrl+c to stop this current server, and try again.
-
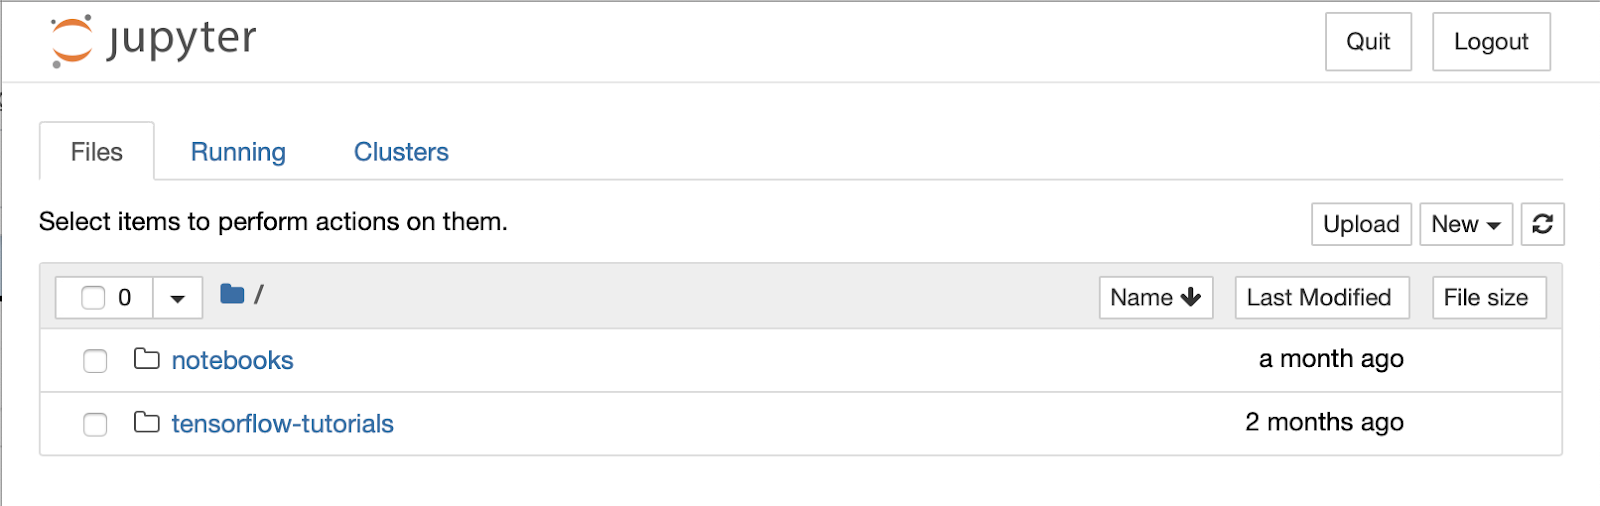
Navigate to http://localhost:8000/ on a local browser. Enter the token from the previous step in the requested field.
- Navigate to notebooks, then create a new Python3 Notebook or use an existing one.
-
Paste in and run this Keras sample application:
import tensorflow as tf
from tensorflow import keras
from tensorflow.keras import layers
import numpy as np
tf.config.list_physical_devices('GPU')
You should get the following output:
[PhysicalDevice(name='/physical_device:GPU:0', device_type='GPU')]